
Hello people!
So here's a first, a Cinema4D post.
Lately I've really been toying around in C4D. I'm sure you remember Abstraction.
Anyway, yesterday I was messing around with GI and trying to find a solution to the 'dirty' renders, as well as how to get descent lighting from a single light-source.
The results were interesting...
If you didn't know, one thing that makes the world more realistic is that lights don't just hit a single surface and that's it, there's some essence of reflectivity. A light hitting a blue wall will reflect that light back with a slight tint of blue and less intense. It'll diffuse back in all directions and hit other surfaces. There's also refraction and caustics included, but those are complications we don't need right now. Here's the Wikipedia article for more info.
Simply put, GI is one of those things that makes your scenes look even MOAR realistic!!
So, here's something I've seen before:

What I have is a reflective sphere, a studio floor and a white plane set with Luminance channel at 150%.
As pointed out, you can see the 'dirty areas'.
There's also this second scene, which has two cubes, a sphere between them, and a cylinder with Luminance:
The entire scene is inside a box-like setup:

Cool! So we have a closed room, and we're ready to get started messing around with GI. The basic idea is that the sphere is hidden from the light by the single cuboid/wall thing. The idea is that in the real world, light would bounce around the room and eventually hit the sphere and light it. Makes sense right?
So, go ahead into "Render Settings", click on the "Effect" button and choose "Global Illumination!
But wait, what's this when I hit render?:
 |
| Render = 0:05 |
Eeew!
Not only am I getting some really 'dirty' sections, there's also no light hitting the sphere. It also looks like it's just an ordinary light with falloff! Why isn't the light bouncing around??
(On a lighter note, I really like the 'hotspot' on the light. GI uses Inverse Proportional light falloff. Which is, you double the distance the brightness halves).
The solution to this problem is simple enough.
By default, Global Illumination is applied with a Diffuse Depth of 1. This means that the light's will only hit 1 surface and stop. Which in turn means that they won't bounce/reflect! Bummer.

So... all we actually need to do is increase the diffuse depth. The thing is we could set this to 200 and be sure it wont bother us again, however, that's just giving your system more to calculate than it needs to. In which case, 200 is FAR too much!
So initially I went with setting to 2 and rendering, then 3 and rendering... and I got this:
(Oh, I also set the "Secondary Intensity" to 250%)
 |
| Diffuse Depth = 2; Render 0:23 |
 |
| Diffuse Depth = 3; Render 0:45 |
Before we get into awwing at the effects of GI, I'd like to point out that in Diffuse Depth 1, the sphere is lit slightly. This is because of the light bouncing from the walls of the room and especially the ceiling. We're also getting a slightly blue look from the blue-ish walls.
It's also important to notice the increased render times. DD 1 had 5seconds while 3 had 45 seconds. So setting 200 on diffuse depth, as assumed before, would've taken MUCH MUCH longer!!
You may have also noticed the "Secondary Intensity" control that appears once we set a Diffuse Depth above 1. This is how strong the light is when it bounces. "Primary Intensity" would be the brightness when it leaves the object. This is a very important control.
So what about color?
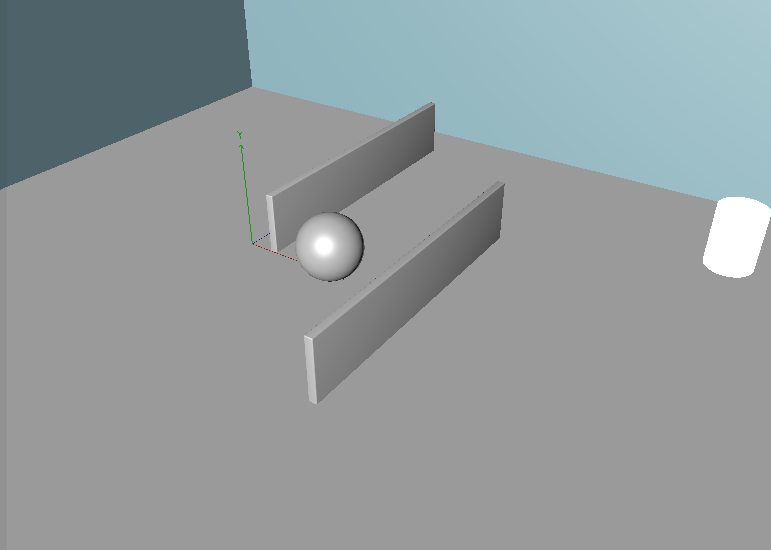
Well, here's another scene I created, this one working in an open environment with two cuboids, a cylinder with Luminance and a sphere. The sphere is not directly visible to the cylinder, however I am hoping to get some light bouncing of the larger cube...

So, with a diffuse depth of 3, and secondary intensity at 700 for illustration, check this out:

Wow, there's light hitting the sphere! And best of all, it's also blue!
Because of the blue wall that the light is bouncing off of, it's changing color and producing something... nice!
So if you're doing indoor renders, there's no need for extra lights to illuminated shaded areas, just crank up that diffuse depth and see what results you get!
Anyway, that's it from me! Hope you learnt something handy!
What do you think? Drop a comment below, or like and comment on the Facebook page