
Hey guys!
In this quick tutorial, I'm going to be showing you how to create a spinner like the one in the title above, but we're going to make it very editable so it can be used for various things (heck, might as well save it as an animation preset while we're at it).
So let's get started!
Create a new comp. 720 x 480 px, Square pixels, 25 fps, 10 seconds should do.
Create a new solid and click on the "Make Comp Size" button.
STEP 2: ADD EFFECTS
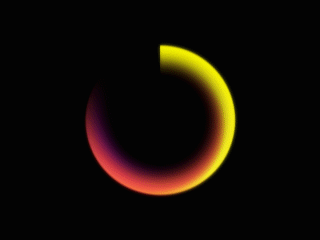
We're going to use 2 effects to create the spinner (Linear Wipe and Polar Coordinates) and Ramp and Glow to add that extra look.
In the Effects and Presets panel, add Linear Wipe (Effect > Transition > Linear Wipe ) and duplicate the Wipe (Ctrl+D) so we have 3 of them. Set the first one to have a direction of 90, completion of 27% and Feather 130 px

On the next 2 Linear Wipes, set the first angle to 180 and the other to 0. Set both their transitions to 30% and feather to 5 px.
Now, add Polar Coordinates (Effect > Distort > Polar Coordinates)
Set Interpolation to 100% and type to "Rect to Polar"

Nice. Effects panel should look like this:

STEP 3: ANIMATE
Okay. Now to animate.
Since it's gonna be an animation preset (if you want), we'll add Transform (Effect > Distort > Transform)
Alt+click on rotation's stopwatch and type in time*-300
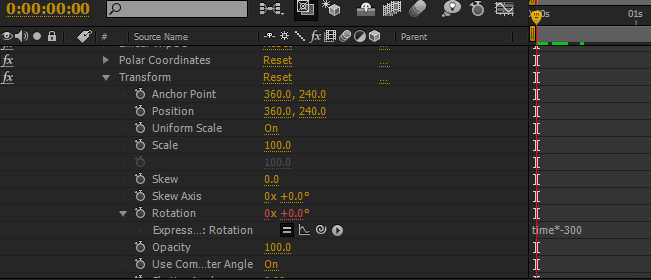
(click to view larger)
Now, we have an animation!
Keep in mind, we're using Transform because we want to leave the layer's rotation so that the future user can use it to add an offset or even wiggle if they wish.
STEP 4: ADD STYLE
Add a Ramp effect (Effect > Generate > Ramp) and send it to the very top of the effects list so that it's also distorted. Change the colors to whatever you want and play around with the points to get some interesting effects:

Finally add a Glow at the very bottom of the list:

(Glow adds an interesting effect)
Play around with the glow settings and ramp colors until you get something you like. I like how mine turned out.
STEP 5: CLEAN UP
Now, in order to keep things neat and legible (and easy to edit later) we can name the Effects.
Head over to the Effects panel and select an effect and press ENTER to rename. Name as you like:

In order: Ramp, Linear Wipe (90), Linear Wipe (0), Linear Wipe (180), Polar Coordinates, Transform, Glow.
STEP 6: TWEAK
Feel free to give your own names. Now, before we save the preset, it's good to notice that if we go into Inner Edge and Outer Edge and Round Feather we can play with feather and completion to create different styles::


STEP 7: OPTIMIZE FOR PRESET
If we're going to make this a preset, we need to consider what changes someone/you might want to make in the future. So we can add a Slider control to control the speed of the spin, just in case.
Create a new slider control by going Effect > Expression Control > Slider Control.
Name the slider "Speed" or "RPM":

Right-click on the slider control under and click "Edit Value". Set the Slider Range End value to 10:

In the timeline, click on the solid and press U to view the expression for Transform's rotation. Type in:
rotator= ((Pick whip the slider control));
time*360*rotator

Set the slider's value to 1.
Okay, we're all set with that, we can now tweak the speed of the rotation. But what if we wanted to flip the animation??
This is a little advanced, so brace yourself.
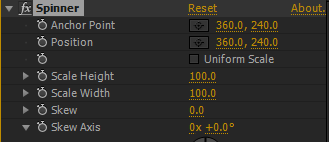
Head over to the Transform (Spinner, in my case) and in the Scale section, switch off Uniform Scale:
Go Effect > Expression Control > Checkbox Control.Rename to "Flip".
Now this bit gets a bit tricky. Alt+Click on the Scale Width in the Transform and in the expression, type the following:
flip=((Pick whip the checkbox control));
if(flip==1){-100} else {100}
Basically what this does is say if the checkbox is on, the value is -100 (flipped), otherwise its 100.
However, we've flipped it but not the rotation. So head back to the Rotator in the timeline (U should show it) and edit the expression so it looks like this::
rotator=effect("RPM")("Slider");
flip=effect("Flip")("Checkbox");
if(flip==1){time*360*rotator} else {time*-360*rotator}
We've added the "flip" string and the if equation. If flip is on it's multiplied by 360, if not it's multiplied by -360. Makes sense?
That bit was a bit complex but we've done a good job, I'm sure. RAM Preview and test when flip is on or off.

Cool stuff!
Finally, ensure that all values and figures are even (not decimal points). So we can set the "Round Feather" (90 Linear Wipe) to 30% completion (rather than the strange 27%) (Ensure flip is off)
STEP 8: SAVE ANIMATION PRESET
Okay, I'm sure we're all set by now. (hopefully your head isn't hurting).
Select all the Effects in the Effects panel and go Animation > Save Animation Preset...

In the new dialog, name your effect whatever you want:

Save.
AE will stop responding for a few seconds. Don't worry, it's not crashed, it's just refreshing the Effects and Presets panel.
STEP 9: TEST
Create a new solid and head over to the Effects and Presets panel and search the name of your preset. It should be at the top. Drag & Drop onto the new solid:

The new solid should appear like our newly created preset :-D
STEP 10: FIND THE PRESET AND SEND TO SOMEONE
The presets are usually saved in the User Presets folder. Head to:
C:\Users\[username]\Documents\Adobe\After Effects CSx\User Presets
and you'll find your preset there. Now just create a fancy README.txt, zip them up and send to a friend! :-D
(send it to me too :-D)
STEP 11: UNDERSTAND
It's important that you understand how the effects are working together. I insist you understand how I came to this idea. I built this in a few minutes because of reason and logic and only knowledge of the available effects.
First off, I thought, how can I turn a square solid into a circular object, and most important, how can I create the fade?
My initial idea was to use the Circle effect with masks for the fade, but how could I get that hard edge at the start and the soft edge on the other side? I'm not a big fan of using multiple effects at once so I tried to find another solution...
What effect turns something straight circular? POLAR COORDINATES!! (Thank you Photoshop!!).
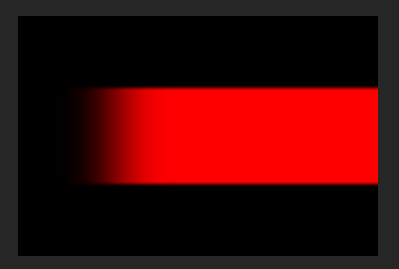
In understood how Polar Coordinates worked, it simply took the left edge and right edge and wrapped them. So, I needed to figure out how I'd do the fade and it was simple enough. LINEAR WIPE with HUGE feather. I did so and tested::

(I actually did something like this in Photoshop by mistake. God bless experimentation)
So I added another Linear Wipe and cut it from the top, then another and cut from the bottom! Because linear wipe adds some form of rotational symmetry, I made sure both their transition values were the same so the final image is centered. Which in actual fact was not necessary.
The use of linear wipe (over masks) meant that the shape would be very easily editable.
THERE WE GO! It's important that when you're trying to achieve a certain effect, don't go straight out and look for a tutorial. Take what you know and try and figure out how you could combine effects and masks and solids and shapes and... basically everything you know!
The expressions and stuff are built off prior knowledge used in previous projects.
I hope all that made sense.
Thanks for reading!
EDIT: FIXING THE WEIRD OFF-CENTER SPIN!
First, thanks to Mawksy for pointing this out.
If you watch carefully you'll notice some very odd off-center spinning. Honestly, I have no idea what's causing it, perhaps a mathematical error somewhere along the line, but it's pretty easy to fix this.
Add a new "Circle" effect (Effect > Generate > Circle) and set the "Edge" parameter to "Inner Edge", then set Blending Mode in the effect to "Stencil Alpha". This will basically cut it out.
This works because our SPINNER transformation is going to happen BEFORE the circle that cuts, which makes things look a lot more uniform and clean.
Don't hesitate to drop a comment below, or like and comment on the Facebook page, or tweet #i2c :-D