Hey peoples!
In this fun post, we're going to look at how to create the 3D illusion using red-blue glasses (old school style) and also how to create the 3D glasses to view the scene!
First off, it's important to understand how 3D glasses work.
Simply put, in order for us to perceive 3D, the left and right eye must see two different angles slightly off horizontally from one another. In Red-Blue 3D, the image is combined and the Red and Blue filter out one another, so each eye is seeing a slightly different image.
In stereoscopic, they are shown in rapid succession while the glasses also close and open each eye at the same rate (which is why you sometimes see the flicker of flourescent lights and such things).
For a more in-depth look on that, check out my earlier post 3D Content, this link on How Stuff Works and especially this page.
So, enough chit chat, let's get started.
PREPARATION: CREATE SOME GLASSES
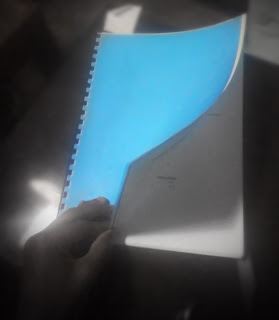
Not everyone has a 3D display, so why don't we just create some Red/Blue glasses which work on all displays?I made mine from covers of spiral-bound booklets like this: (pardon image quality)

Tore it right off!
I got the red one from a nice book store for only 10 bob.
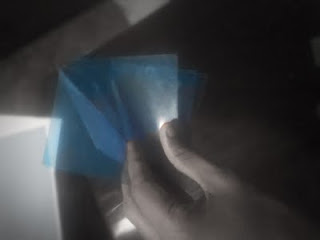
Next, fold the two twice, this will make the colors a lot stronger, since they're quite weak for readability reasons.

Fold them tight. There should be a minimal gap between the folds so as to avoid distortion and such. You can staple the corner edges to keep them nice and clean:
The corner there is where your eyes would go.
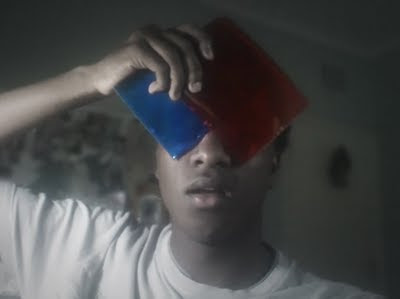
Okay, we're pretty much all set. You could probably create some decent 3D glasses out of some cardboard or manilla. I haven't gotten around to doing that, so I work like this:

Luckily, I only have to hold them up when I'm checking, not the whole time XD
We may also need to test out the glasses. It'd suck if we're done making the project and the glasses don't look right, it'd also be great to build up some hype to create our own projects. So, here's a little video to try it out:
Okay, mine look good. Let's get into the software!
STEP 1: CREATE THE COMPOSITION
This process can apply to any application, even 3D apps. But for the sake of simplicity we're going to do this in After Effects.
Before we can start creating the 3D effect, we must first COMPLETELY create the scene.Create a new comp and add a new solid and name it BG, keep it black. Add another solid and add CC Particle World to it. In my instance, I've used Parent to Layer preset, which can be found here (free).
We're playing with 3D here, so the first thing I did was set the Radius Z up (3.2) and also the X to keep things from bunching up around the middle. I also changed the particle type to Bubbles, Birth Rate to 0.2 and Longevity to 2 seconds. I also had to change sizes of Birth and Death to 0.9, opacity to 80%. At 6 seconds it looks like this:
It's also important to turn the velocity down so that the viewer has time to see what's happening.
Now, if you read the article above, or at least this page, we have to get two angles of view to show each eye. The first problem you'd face (especially with animation) is that animating two cameras to always stay adjacent to one another is rather difficult. Lucky for us, we can parent the two cameras to a Null object, then animate the Null object. That part is extremely important. But since we always use Nulls with cameras, it's nothing to worry about, really.
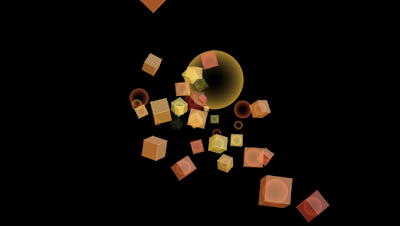
So, we could make the scene a bit more interesting, maybe throw in another particle system with cubes. So I just duplicated the first one and changed around the settings to get this:
Since CC PW is using the same seed as the previous system, some of the bubbles are being held inside the cubes, which looks pretty cool.
I think this can work for our first work.
So let's move into the cameras.
STEP 2: SET UP THE CAMERAS
Create a new Null object and a camera. Make the camera a child of the Null (by parenting). Ensure that the Null is 3D. Now press P to view the position:Notice that parenting has now made the camera's position values relative. This means that we can now use fixed values to offset the camera. You'll see why in a bit.
Set the camera's X value to 10, then Duplicate the camera and set the new one to -10. If we switch to Custom View, it should look like this:
They now work like a pair of eyes. Notice that they also converge their views on the Null. This can sometimes be unwanted (depending on what you're doing). If you'd like to have parallel cameras, you can have two Nulls with each camera parented to each Null, then parent those too nulls to another null that will be animated.
For this case, we won't need to do that. This method works better with Depth of Field, but DoF isn't always good with 3D, it causes eye-strain, so I'd suggest keeping away from it.
Next, we can switch the top camera on and off rapidly. Notice how the view changes slightly and some objects move greater distances than others. This is the parallax effect that we're using to simulate 3D. Our brains calculate this change to tell how far or close objects are.
Now, we can take this opportunity to rename the cameras to which eye they represent. While in custom view, we can select a camera and see which wireframe is activated and name them appropriately. It's also pretty obvious that the 10 one is Right and -10 is left.
Okay, now we're pretty much ready.
STEP 3: SET UP THE 3D COMP
Okay, we're all set. Now head over to the Project window and select "Comp 1". Duplicate (Ctrl+D) then rename one to "RIGHT" then the other to "LEFT".Open both comps and switch OFF the camera that doesn't share a name with the comp. So in LEFT, switch of RIGHT, and vice-versa.
With both views side by side, we can see the difference is very slight, but it's there. We're not looking for a huge difference, our brains pick up even a 1 pixel difference.
Now, select LEFT and RIGHT in the Project window and drag-and-drop them onto the New Comp button.
Settings should look like this (still duration doesn't matter):
Click OK and we'll get a comp named "RIGHT 2" with RIGHT and LEFT together!
STEP 4: ADD 3D GLASSES EFFECT
To create the 3D, add a new Adjustment Layer and add the "3D Glasses" effect (Effect > Perspective > 3D Glasses)Everything will go black and we'll have two cubes in the scene. This is okay:
In the 3D glasses effect settings, set the LEFT and RIGHT views to their respective pre-comps. That's all we need to do at this point.
By default, 3D glasses starts with "Stereo Pair", which is what would be used for a 3D display. They usually show each view on either side of the screen, then the display will interpolate them for the viewer.
In this case, we can't view it directly, and I don't have a 3D display, so let's have a look at what other options we have:
I think Red Blue LR would be what I'm looking for. LR means that Red is left and Blue is Right.
You'll notice that choosing Red Blue LR removes all colour and makes the scene purple-ish. This isn't too good looking, so we can just set it to Balanced Colored Red Blue to maintain our colors. Here's how mine looks:
Not too bad. Tweak the Convergence value just a little bit to increase the depth. Obviously it'll reach a point where it doesn't look 3D at all and only hurts the eyes.
THAT'S IT!
Final words:
-set the viewer to full screen and stand a few metres away from the screen then watch. For some reason, standing further from the screen increases the 3D look.
-Add some more elements to accentuate the 3D effect, like a grid layer as a floor and so on.
-Try varying the distances between the cameras and see what difference it makes.
What do you think? Drop a comment below, or like and comment on the Facebook page, or give a shout on the Forum
Cheers!


