
A while ago I posted Holographic 4 and I thought I'd share how I created the wavy screensaver that's very similar to the backdrop of the PlayStation3 and PSP menus.
If you haven't seen Holographic 4, you can see it here.
So, let's head in!
Create the Comp and Solid
Let's start by creating a new comp. I'm using 1280x720p (1.00) 25fps and 10 seconds long.
Next I'll create a yellow, comp-size solid.
So far, pretty simple.
Symmetry
For this to work, we're going to need some serious symmetry. So we'll start by drawing up some guides, with the help of the Info pallet, the Title/Action Safe and the Ruler. The last two are accessible via the "crosshair" button:


We're going to create two guides. One vertical, one horizontal.
So, hover over the top ruler and drag down until you see a value of 640 (1280/2). Then grab the left ruler and drag to 360 (720/2). It's easier to place them if you're at a zoom level of 200%.

The Title/Action guides give us the general area of the centre, the Info pallet gives the EXACT position. Cool beans!
Once you're happy with your guides, you can switch off the Ruler and Title/Action safe guides, so we can then start drawing.
Draw in the Vertices
Okay, we're going to use the pen tool to draw a symmetrical path. This is perhaps the trickiest bit.
Make sure the Yellow Solid is selected and, while holding Shift, we're going to place 3 vertices. So we'll place the first one on the left side where the horizontal line meets the edge.
But I face a problem, I end up clicking on the guide. So go View > Lock Guides so we can't move them by mistake.
Now, place three vertices while holding Shift. Holding Shift will keep all three in line.
One on the left, one in the centre, and one on the right. Use your guides to place them as accurately as possible. You probably can't get it the first time. You shouldn't anyway, because we can use the guides to our advantage.
Next, select the move tool then go View > Snap to Guides. See? We can not move the points up/down and they'll snap to the lines, meaning the can be EXACTLY where we need them.
So take the time to reposition the points. Watch the Info pallet. The one on the Left should read 0, 360.
Centre should read 640, 360, and right edge should be 1280,360.
See how easy it is with the guides?

I noticed that the middle vertex appears off centre, though our Info pallet says it's correct, so I'll go with it.
THE CURVE!
Okay, so now that the points are set, let's turn this into a curve.
Click and hold on the Pen tool (or tap G a few times) to get the Convert Vertex tool.

This is a very useful tool that turns vertices into bezier, or turns bezier into standard corner vertices. It also works with paths for position animations, btw, so try that out.
For the moment, we're going to convert the MIDDLE vertex to a bezier. We'll stretch this bad-boy out to create a symmetrical curve, which is easier said than done.
Click and drag on the middle vertex and try get the shape to have a fairly symmetrical appearance. Depending on how "curvy" it is, the angle you drag changes. Here's a few variations:


I found that if you go into the "crosshair" menu and activated the "Proportional Grid" and the "Grid", you can get some fairly accurate results.

Though it doesn't have to be THAT accurate.
Stroke It!
Okay, let's draw in a line, but first, switch off all grids and guides. You can also hit Ctrl+Shift+H to hide the mask path.
Go Effect > Generate > Stroke.
This is a nifty effect that draws lines on mask paths.
We'll change a few things. Change the color to Red. Increase the brush size to 12, change the Paint Style to on Transparent:

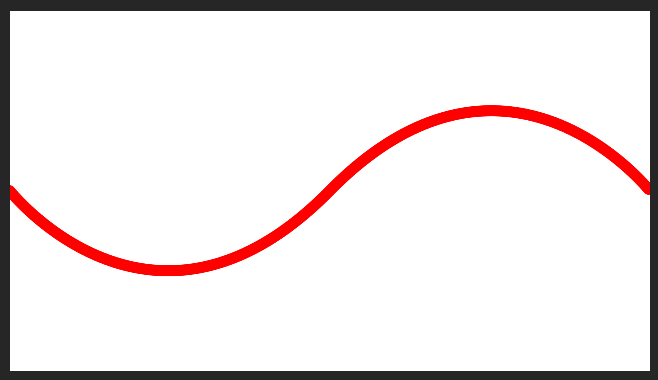
Cool!
Making it Wave!
Head into Effect > Distort > Offset.
Now, while holding down Shift, click and drag the first number in the Shift Centre to control. Holding down Shift makes the numbers increase more rapidly.
WOOOW!!
Now, if you DON'T see a wave, but see more like a shape moving from side to side, don't worry. This is coz you know what's going on. If you look at the animation in the title, you'll probably see the shape as well, but I'm sure before you hadn't. That's the trick!
What Offset does is it basically moves the layer, but whatever pixel crosses the edge is moved to the OTHER SIDE of the composition. Like this:
 |
| The Windows sample images are good for something! Experiments. |
So that's what's happening above. Now all we need to do is animate the offset. But, if you offset a bit and look closely, you notice:
 |
| That right there is a seam! |
Aww, a seam! Not good. This will break our nice continuous shape (as seams are fond of doing). Depending on how you drew your curve, this will cause problems. So let's look at how to minimize it.
Seamless
Select Yellow Solid 1 again and let's look at the points. We basically have to reposition the two outer points to line up the... line... but we need to move it as LITTLE as possible so we don't break our symmetry.
With the offset still applied, we can observe what happens when we move each point. We'll use an easy system: if we move one point up, we move the other one down.
So what I did was move the left side up, then the right side down. I only moved a few pixels (maybe even 3 pixels each).
This part is really up to how you drew your curve. So, here's mine now:

Cool! It's not completely gone (the curve does look like it's doing something odd). You could use the Convert Vertex tool on the two outer points to get something cleaner, but honestly I think this is good enough.
ANIMATE!
For the animation, I'm going to use an expression. For three reasons:
1. It'll be easier to tweak any extra copies we make.
2. Down the line we may find that we need to make the comp longer. This could mean lots of keyframes to edit.
3. Product placement!
3. Product placement!
I'm going to assume you've read AfterEffects Expressions Basics, if not, go ahead and check it out. It's free, it's easy to use, and you can read it online or download!
So, enough with the advertising, let's add the expression.
Alt+Click Shift Centre and add this expression:
[time*800,value[1]];
Basically, we're having the X be a multiple of the time in seconds and 800, and we're keeping Y at it's original value. Cool!
DUPLICATE!
Okay, let's make more!
Select "Yellow Solid 1" and hit Ctrl+D a bunch of times.
Next, we'll vary them:
1. Change the colors (obviously) and brush sizes, but we can also change the X scale of the layer to make some waves longer than others.
2. Use Convert Vertex tool to re-convert the middle vertex to change the look of each wave.
3. Change the multiplier of time in the expression (Press U with the layer selected) to something else. And add a + to offset them. eg [time*250+100,value[1]];
Here's mine:

After a few adjustments (added some Linear Wipes to hide the edges), here's my final result:

and here's the one from Holographic 4:

Notice the seam? Yep, got away with it :-D
AWESOME!
So now you know!
I hope this tutorial was helpful!
If you have any problems/questions, feel free to drop a comment below!
I hope this tutorial was helpful!
If you have any problems/questions, feel free to drop a comment below!
You can download the completed project file here!
RELATED POSTS:
See you soon!
Your feedback helps keep the i2c cool and awesome. Let me know what you think by dropping a comment below.
Cheers!
Your feedback helps keep the i2c cool and awesome. Let me know what you think by dropping a comment below.
Cheers!